I’ve always wanted to try my hand at making a pillbox hat, but millinery has also seemed a little intimidating and I’m not fond of sewing. But, I felt determined to give it a try, so I looked up a few tutorials and was happy to find that I could probably make one with little to no sewing at all using a technique I had read about when researching making clutch purses – professional strength double sided adhesive sheets. I’d ordered a small stock of them and some clutch purse shells as a Christmas gift for myself, but have been feeling a little burned out on embroidery – which is what I want to do for the purses.
This project ended up being entirely no-sew, I am pleased to report. I intend on writing a tutorial, and took numerous step-by-step photos of my process, but I’m hanging onto it for now – not quite sure how I want to present it just yet, and I’d rather use the time I have at home right now to concentrate creating instead.

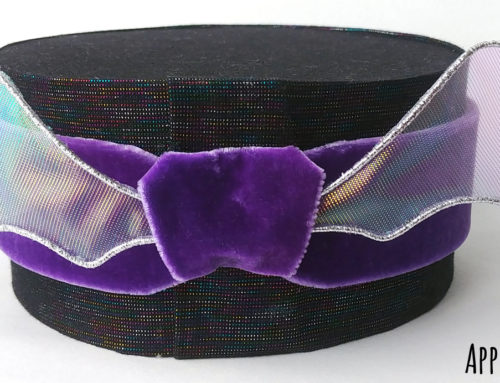
The fabric I used for the base of the hat is a navy blue dupioni silk that I bought when I was still in college. It made me feel a bit nostalgic working with it because it was the first fabric I’d ever made a tsumami kanzashi from – a chrysanthemum hairclip. This was long before I’d ever become serious about tsumami craft or lived in Japan, and I bought far more fabric than I needed. I actually still have some left, and I’ve been pondering how to use it up.

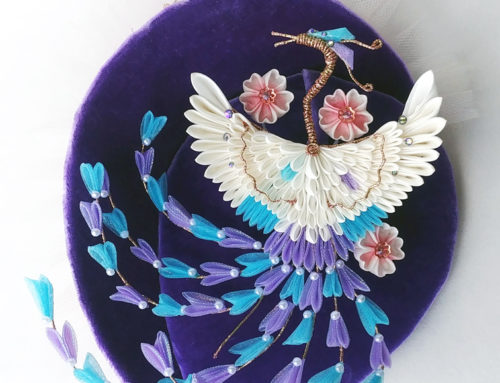
The lilypad is made from rosegold glitterwire and fantasy film sheets – the same material that many fancy faerie wings are made from. It shifts color depending on the lighting and angle that you view it from, which is really neat.
The waterlily and dragon fly are made from glitterwire and organza. Wirework with fabric is a relatively popular kanzashi making technique, which I’ve paired with my tsumami craft works in the past, but this is the first project I’ve done that’s primarily wirework with no tsumami craft accompanying it.
I actually spent a few hours debating with myself about whether or not to include the dragon fly.
I took some test photos and was concerned that it might be too much, even though I’d been wanting to do a new piece with a dragonfly for the better part of a year. In the end I stuck with my original vision and kept the dragonfly. I can’t say I regret having done so.
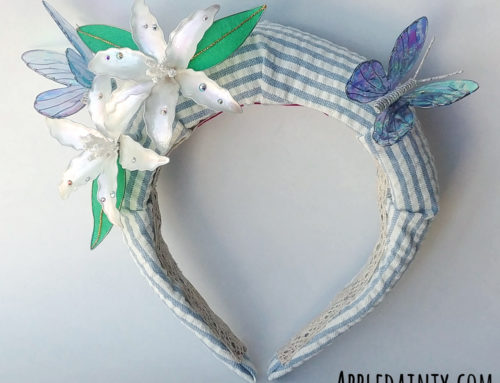
The finishing touches for this hat were the lace edging around the interior of the brim, and the Apple Dainty tag. I had the tags made ages ago, when I thought I would try my hand at sewing again, which of course never happened – hah! The lace edging serves the dual purpose of covering raw fabric edges and creating loops through which I can feed hairpins, a comb, or elastic – making the hat easy to secure to the head.

At the end of the day, this project turned out just as I’d hoped it would and I’m very proud of it. I’ve even been thinking about making a few more pillbox hats in different designs, but I don’t want to get ahead of myself – I have so many planned projects already I don’t need to be thinking of more to add to my list!
Anyhoo, that is all I’ve got for this week. If you like this blog and want to help support it, consider buying me a coffee. Your support is greatly appreciated, and I hope that you check back again soon for more art, crafts, and creativity!
[…] I finished my pillbox hat earlier this month I was immediately struck by the urge to make another hat. I really enjoyed […]