
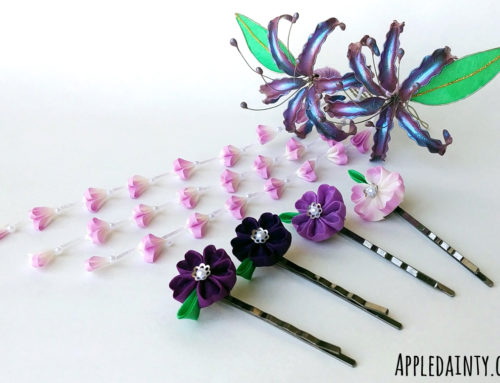
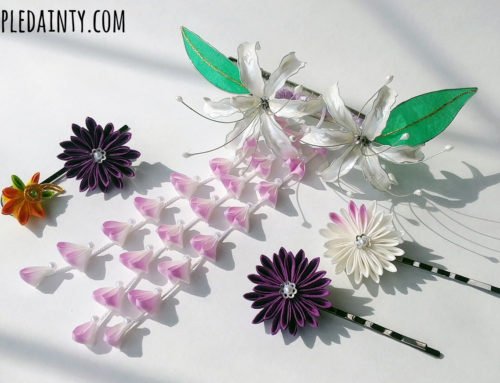
Recently a friend commissioned me to make a spider lily hair clip for her wedding. These lilies were my first attempt at making spider lilies – but weren’t quite the shape she was looking for. So, I decided to repurpose them for another project – a padded headband.
I’ve always been a big fan of headbands, they are a part of my signature look I would say. So of course I have always wanted one of the padded fascinator style ones. Buying fancy designer fascinators is, of course, very expensive – but if you’ve been following this blog for any length of time you are probably aware that … I have a particular set of skills.

I’ve had some blank headbands in my supply cache for some time, since I made my tsumami craft headband actually, thinking I would probably make more of them in the future. It’s been two years since that first headband so it’s about time, I’d say. I ordered a piece of foam cushioning for upholstery work online, and it finally arrived earlier this week, so I took a break from tsumamicraft to work on remaking the spider lilies for my commission and creating this headband.
I started this project by cutting a rectangular piece of 2-inch upholstery foam. The piece I bought turned out to be not quite long enough to cover the whole headband, but I used off cuts from carving the archshape to cover the ends.
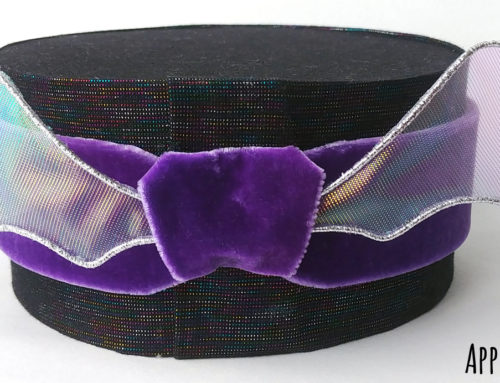
I glued the foam to the headband using hot glue. I wasn’t actually sure this would work. since I know that hot glue can melt foam – but it seemed to work just fine on the upholstery foam. I carved the arch shape using a combination of a sharp box cutter and a pair of standard scissors. Once I had a general shape down, I cut a piece of my blue and white striped fabric large enough to cover the headband, folded it over the foam and glued it to the underside of the headband.

I found the easiest way to do this was to wrap the fabric around both edges of the headband at once, starting from the center, working my way down to one end, then returning to the center and working my way down to the other end. My first attempt was not great – I had to strip the fabric and glue off and do it again, because I cut the ends too short and the finishing lace ribbon couldn’t cover up the bare underside of the plastic headband.
This method gave me pretty good results. It certainly made it easier for me to pull the fabric with relatively uniform tension, and it was much faster and easier than the first attempt. To finish, I trimmed the excess fabric and covered the raw edges with a piece of lace ribbon.
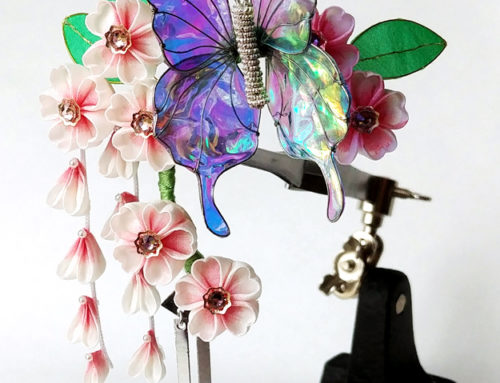
Once the headband was together, I decided the lilies needed a little something. I gave them a coat of peachy pink sparkle, and a couple coats of UV resin. Then, I created some blue butterflies to accompany them. The butterflies are hand made wire frames backed with fantasy film sheets, then coated on the front with UV resin to give them a holographic glass look and better adhere the holo film.
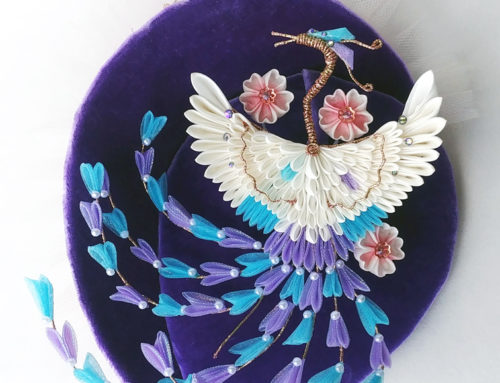
I had intended to decorate the lilies sparsely with aqua and peach shine a/b rhinestones to represent dew drops, but when I took the flowers upstairs and saw them in natural light I discovered they had some black dust speckles embedded in their resin finish that weren’t visible in the artificial light of my basement. I managed to remove some of the dust, but the rest I covered up with extra rhinestones. They aren’t exactly how I imagined them originally, but still pretty good.

After getting these pictures, I decided to rearrange the flowers a bit, and discovered that I could stabilize them by using a tiny bit of UV resin to tack them to each other. It’s nice to have things be repositionable, but for this piece I felt like it was important to make sure the flowers couldn’t be pulled out by vigorous movement or a strong breeze.
All in all, I’m really thrilled with how this headband turned out. I wasn’t expecting to be making it at this moment, but it was a good break from folding little squares of silk. After spending a week with sore fingertips from bending and shaping wire, and the chemical smell of resin, I am looking forward to returning to my silk folding.
Anyhoo, that is all I’ve got for this week. If you like this blog and want to help support it, consider buying me a coffee. Your support is greatly appreciated, and I hope that you check back again soon for more art, crafts, and creativity!
[…] from my stash. To that end, this week I took on a new project – a clutch purse to match my padded headband – and used up some older materials to create a matching obidome, which are worn on a obijime […]